
Well, I’ve finally gotten all of the photos of the assembly and installation gathered together, and I’m ready to tell you all about our closet adventure! Our house is a small ranch, and each of the bedrooms has a built-in closet, which is great. But, there was just not enough space for two adult’s clothing in one small closet (oh, the troubles of a middle-class life of plenty!). I started doing some research, and I thought that standalone wardrobes might be a good solution. I knew right away that I would probably find what I wanted at IKEA. And, I was right! After considering several options, we decided to purchase two BOTNE wardrobes from IKEA.
We made the 2+ hour drive down to the New Haven IKEA on a Sunday after my daughter had left for Florida with my parents for vacation week (I figured it would give me something to do so I wasn’t obsessively texting them to make sure she was okay!). Of course, it was raining. And, I mean RAINING. My poor husband got absolutely drenched while we were trying to load to boxes into my dad’s truck. Thankfully, we had brought some plastic with us to cover up the boxes, so there was really no damage to the wardrobe parts during the drive back in the rain.
And now, without further ado, an illustrated view of the assembly process.
Step 1: Unpack boxes (it’s always handy to have a helper, or two).
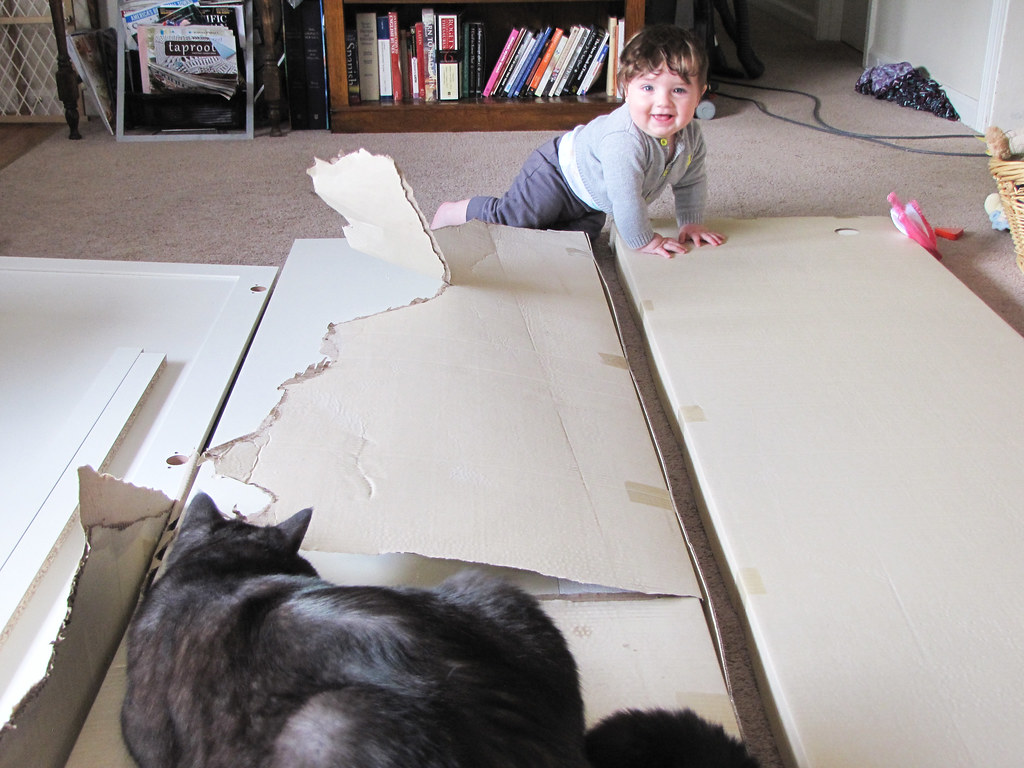
Step 2: Begin assembly (again, help is always appreciated).
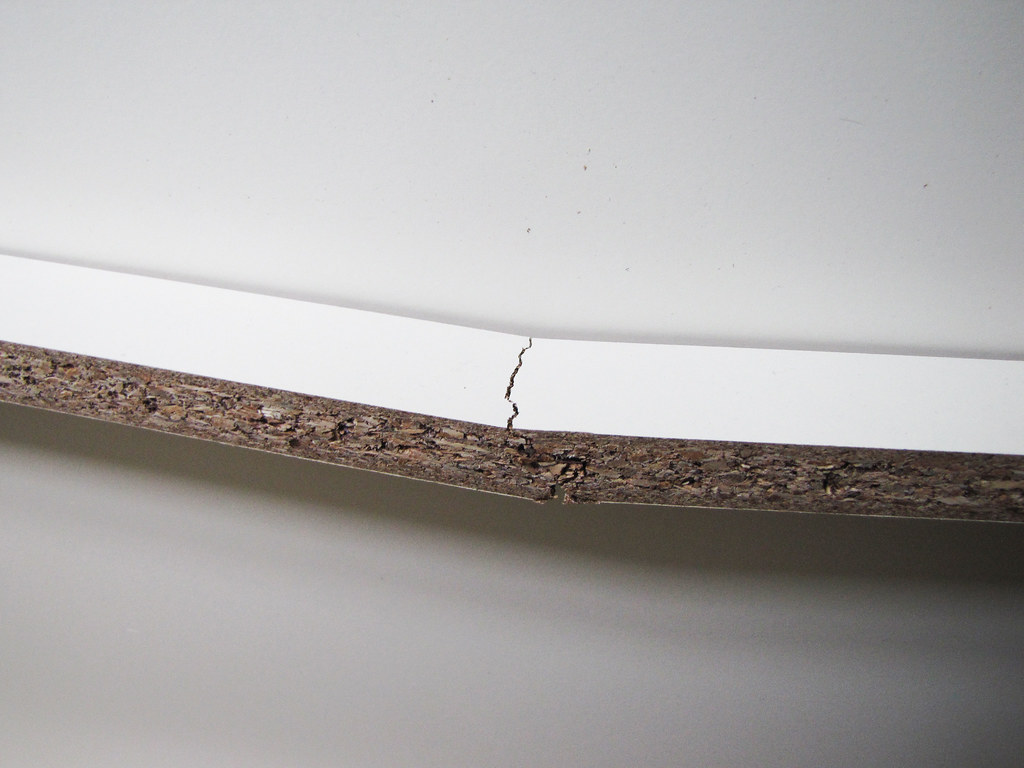
Step 3: Break something (or how our BOTNE wardrobe earned the nickname “Botch-Me”). Thankfully, this cross-bar did absolutely nothing for the structural integrity (ha!) of the frame.
Step 4: One Botch-Me completed!

Step 5: Two done, and in place! Now we’re getting somewhere!

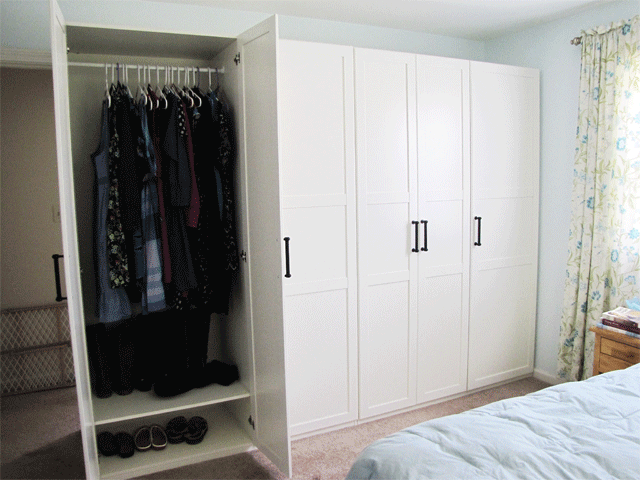
Step 6: Kelli installs the shelves and rods and fills her side with clothing and shoes because she is too impatient to wait for Damian to come home from work. Pretty colors!
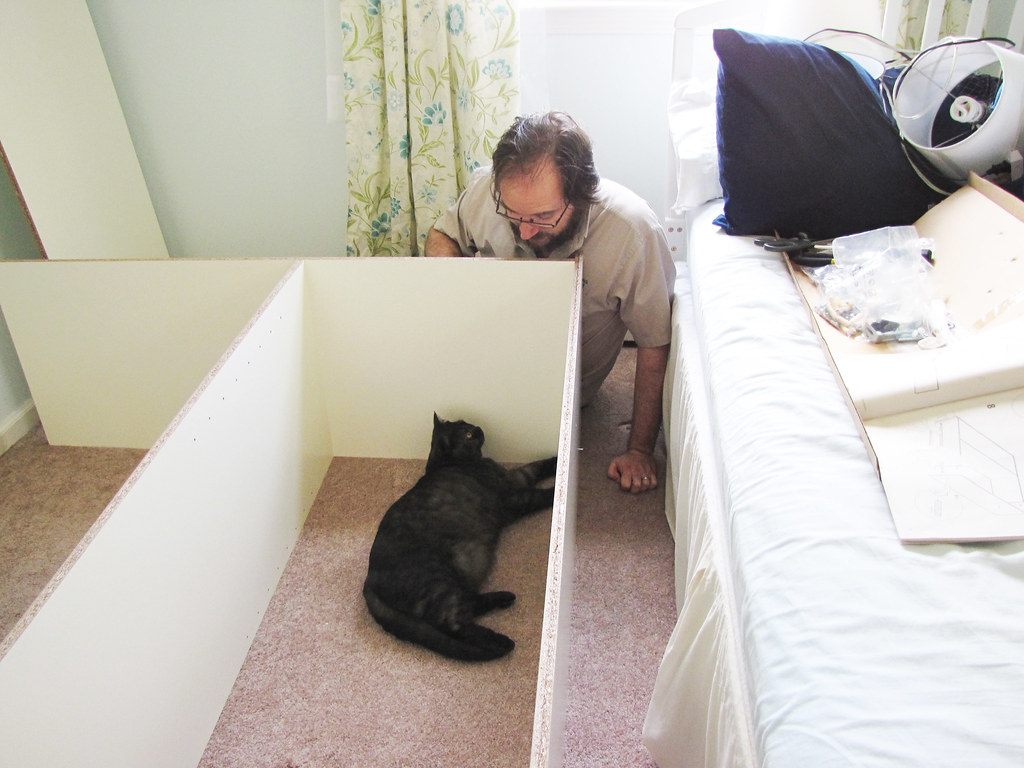
Step 7: Damian completes the assembly of his side, under strict baby supervision.

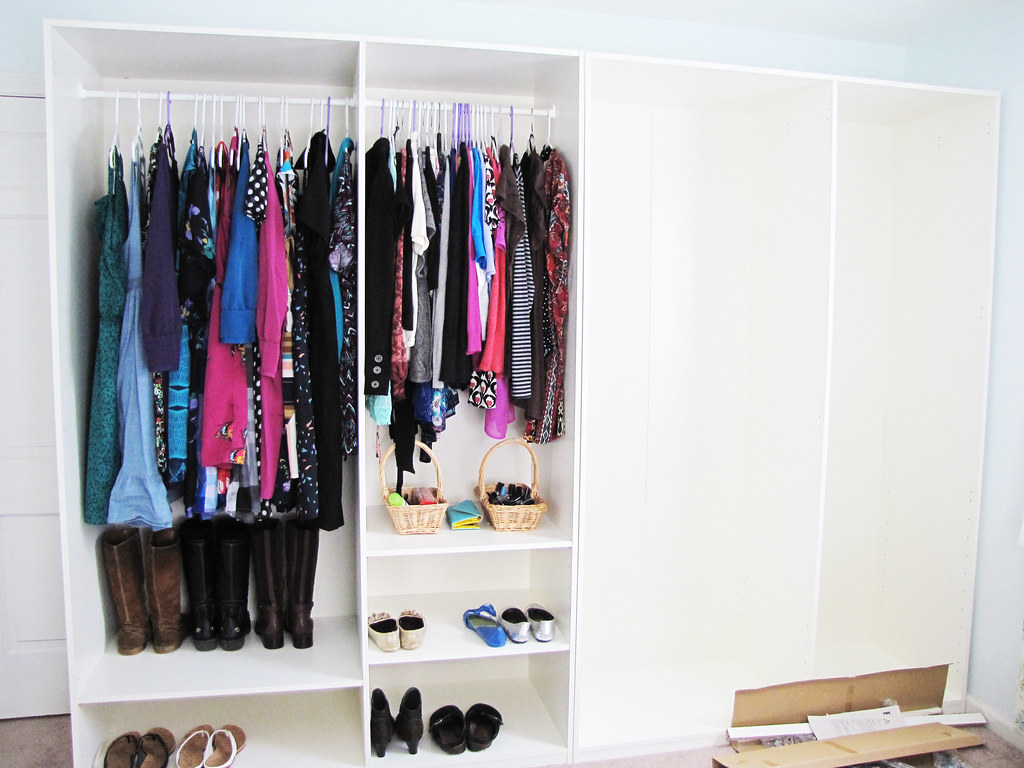
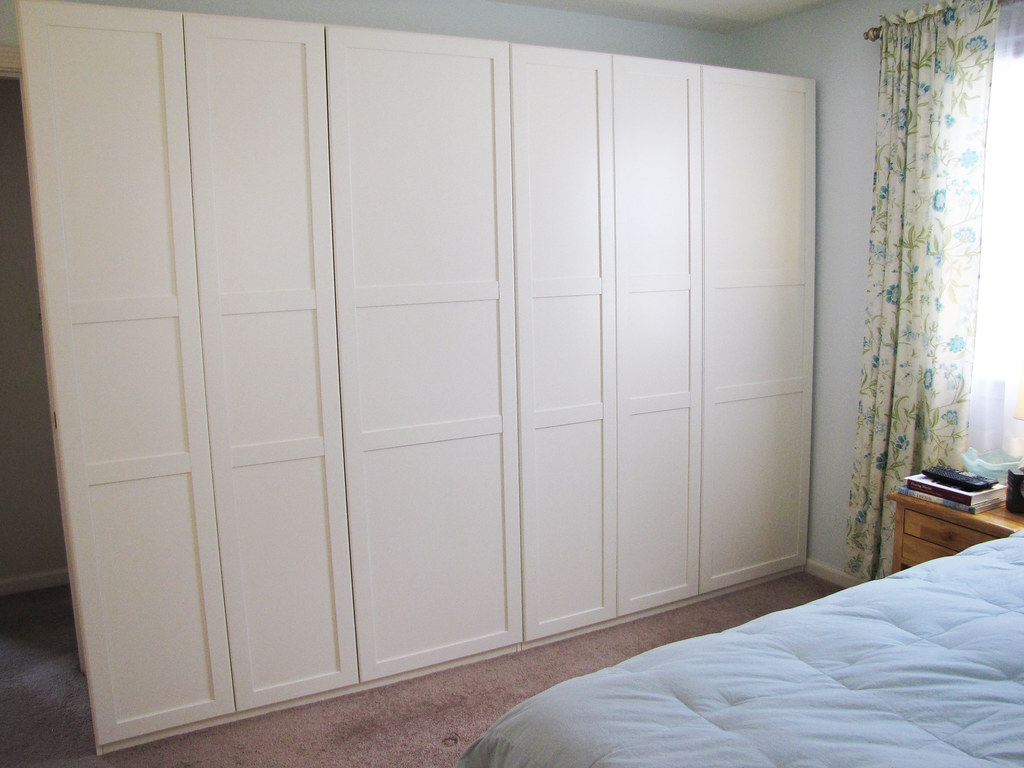
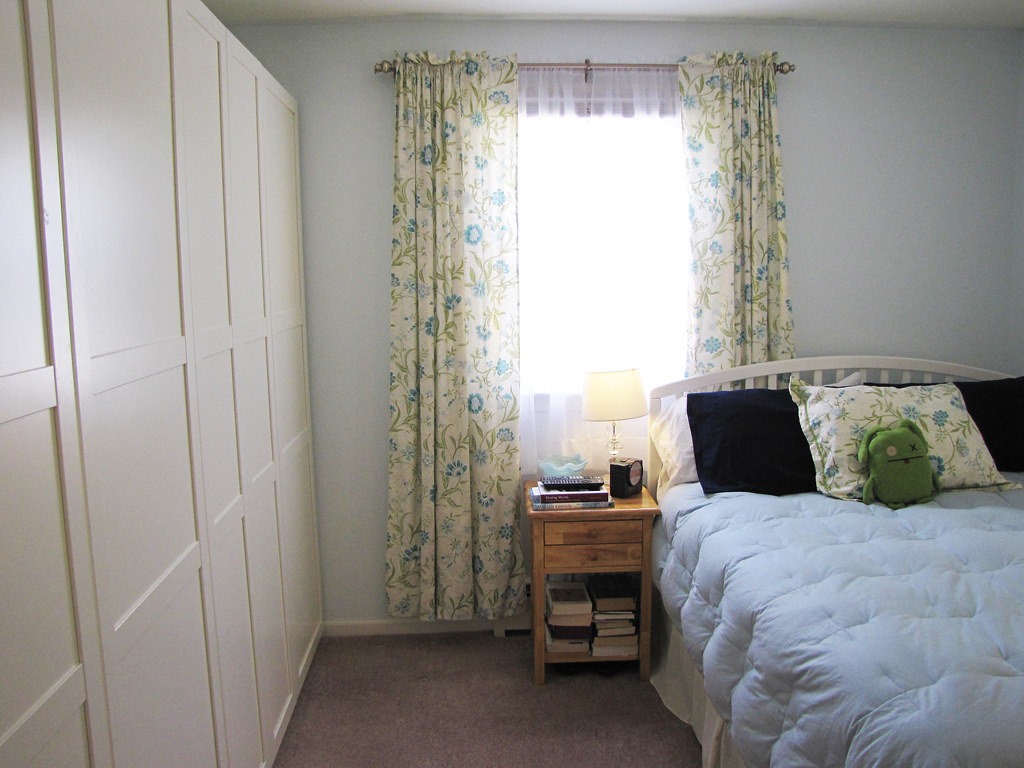
Step 8: Completed wardrobes (minus handles).
Step 9: The most wonderful thing that has ever happened to our clothing, ever. I am in love.
Assembly took about four days, with many breaks in between for working (Damian) and other things. I am beyond pleased with how this all turned out. The wardrobes actually blend together seamlessly and look like they are built-ins. We have so much well-lit, clean space for our clothing, and now we can use our old closet to store other things, like the vacuum (which has been living by the front door since we moved in). As always, I am impressed by the quality, design, and price of IKEA’s products. They have a lot of other wardrobe storage options, so you should check out their website if you’re in need of more space for your stuff.
Latest posts by Kelli Ann Wilson (see all)
- our common hours - October 14, 2016
- september - October 1, 2016
- 28 // 52 - August 31, 2016
- in the woods // a happy childhood - August 30, 2016
- 25, 26, & 27 // 52 - August 30, 2016